
Introduction
Today, in this article, we discuss Halloween Nail Ideas. Halloween is the perfect time to get creative with your nails. You don’t need to go to a salon or spend hours on complicated designs. With a few simple tools, colours, and some imagination, you can create amazing nail art at home.
In this article, we will explore easy Halloween Nail Ideas that are fun, quick, and perfect for everyone. From spooky patterns to cute mini designs, there is something for everyone.
Why DIY Halloween Nails Are Perfect for Everyone
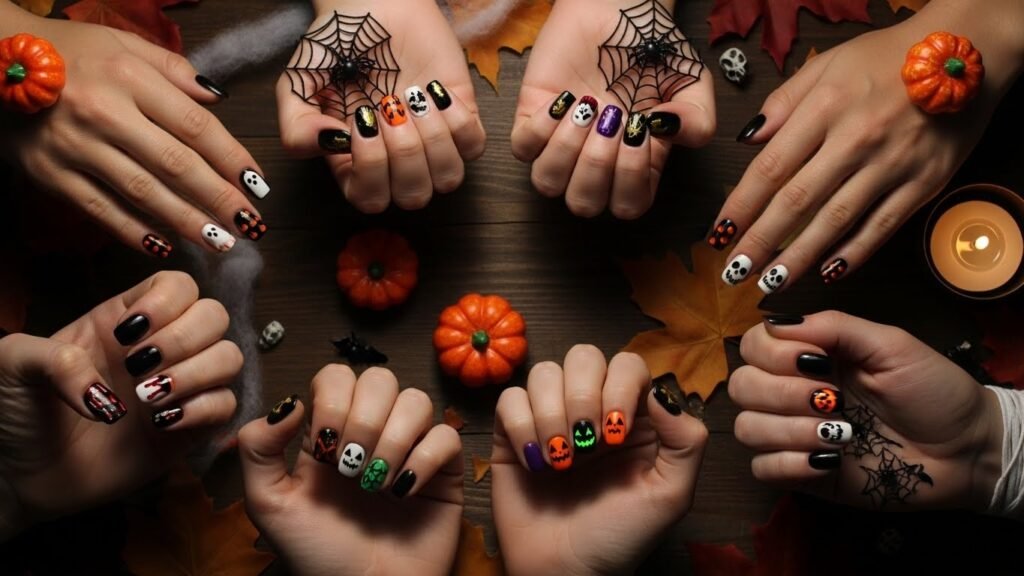
Doing your Halloween Nail Ideas at home is not only fun, but it also saves time and money. You can choose the colours, patterns, and themes that match your costume perfectly. Whether you like spooky ghosts, glittery pumpkins, or simple designs, DIY nails give you freedom and creativity. You can also make small adjustments if one nail doesn’t turn out the way you want. Plus, it’s a relaxing activity you can enjoy alone or with friends.
Essential Tools for Easy Halloween Nail Ideas
Before starting your Halloween Nail Ideas and nail art, make sure you have the right tools. Even simple supplies can help you create amazing designs. Here are the essentials:
- Base Coat: Protects your nails and makes polish last longer.
- Top Coat: Seals your design and adds shine.
- Nail Brushes: Small brushes help with detailed designs.
- Dotting Tools: Perfect for making dots or small patterns.
- Nail Polish Colours: Classic Halloween colours include black, orange, purple, white, and green.
- Nail Stickers or Stamps: Optional, but saves time for detailed designs.
Having these items ready makes creating Halloween nail ideas faster and easier.
Simple Halloween Nail Ideas You Can Try
Halloween Nail Ideas don’t have to be complicated to look amazing. With just a few colours and simple designs, you can create nails that are both fun and festive. The key is to start with easy patterns that anyone can do at home, even beginners. Here are some simple Halloween nail ideas you can try right away:
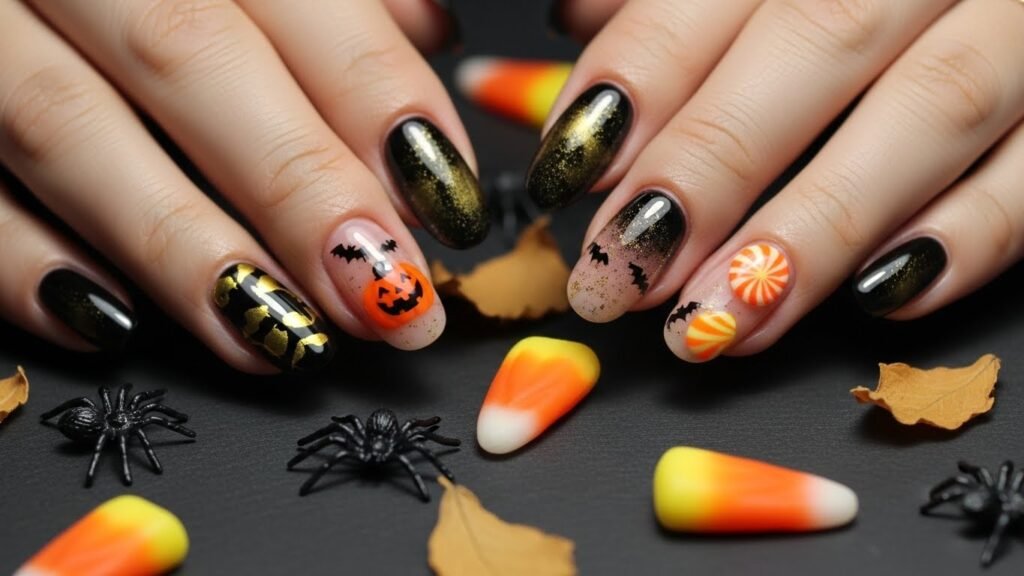
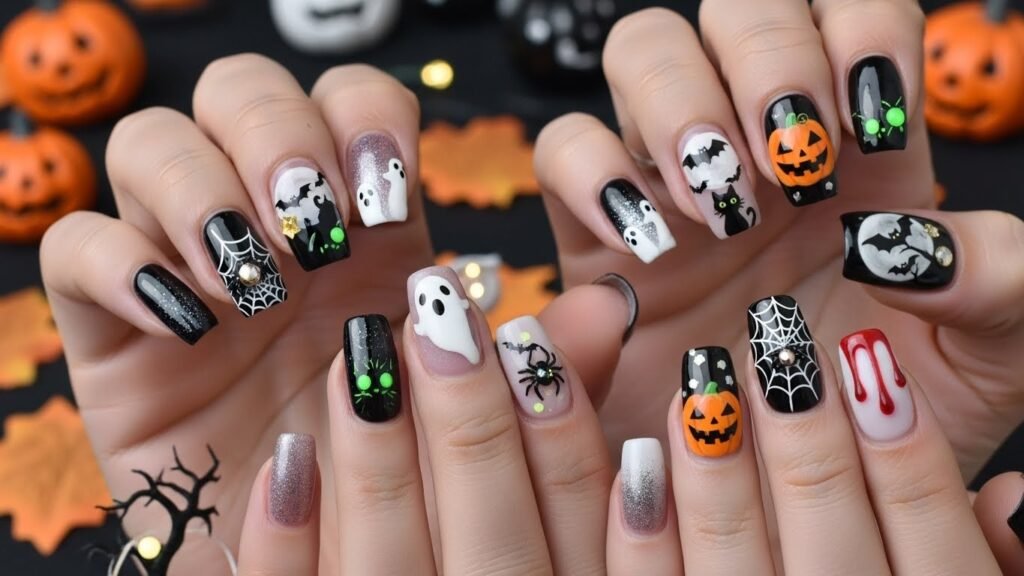
1. Mini Pumpkin Nails
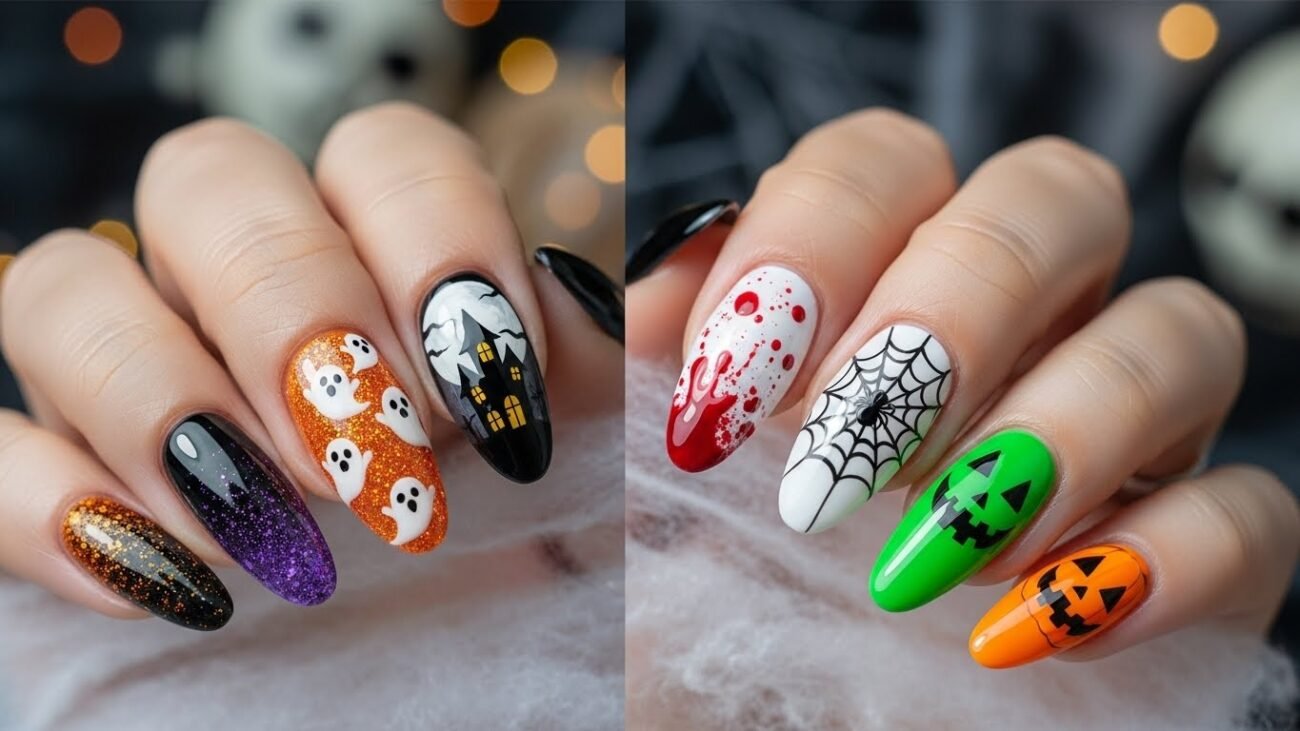
Pumpkins are the most recognisable symbol of Halloween. For this Halloween Nail Ideas and design, paint your nails a bright orange colour as the base. Then, using a thin brush or a black nail pen, draw small pumpkin faces on one or two accent nails. To make it more realistic, add a tiny green stem at the top. This design is playful and perfect if you want a classic Halloween look without spending hours on your nails.
2. Cute Ghost Nails
Ghost nails are simple, quick, and very cute. Start with a white base on your nails. Once dry, use a black dotting tool or a toothpick to draw two small eyes and a little mouth for each ghost. You can create ghosts on all your nails or just use one accent nail for a subtle effect. This design is beginner-friendly and looks adorable on short or long nails.
3. Candy Corn Stripes
Inspired by Halloween treats, candy corn nails are colourful and easy. Paint your nails in three horizontal stripes: yellow at the base, orange in the middle, and white at the tip. You don’t need to be precise; even slightly messy lines look cute and festive. This is a fun and cheerful design, perfect for kids or anyone who loves sweet Halloween details.
4. Spooky Spider Web Nails
Spider web designs can look complex, but they’re surprisingly easy. Paint your nails a dark base, like black or purple. Once dry, use a white or silver nail pen to draw thin lines in a web pattern starting from one corner of the nail. You can add a small spider using a dotting tool for extra effect. This design adds a spooky touch without taking too much time.
5. Simple Glitter Nails
If you want a quick and stylish Halloween design, glitter nails are perfect. Apply a black, purple, or orange base and add a layer of matching glitter polish on top. You can cover all nails or just create one glitter accent nail. Glitter adds a festive sparkle and can make even the simplest nails look special.
6. Easy Skull Nails
Skulls don’t have to be scary or complicated. Use a white base and draw small black dots for eyes and a tiny line for the mouth. This minimalistic design is quick, cute, and works well as an accent nail alongside other Halloween patterns.
7. Bat Silhouette Nails
For a nighttime Halloween vibe, try bat nails. Paint your nails a dark purple or black base. Use a thin brush or black nail pen to draw small bat shapes on one or two nails. Even simple V-shaped wings look like bats when paired with a dark background.
Tips for Simple Halloween Nail Designs:
- Start with one accent nail if you’re a beginner.
- Use dotting tools, toothpicks, or thin brushes to create small details.
- Keep nail stickers or decals handy for ultra-fast designs.
- Don’t worry about perfection—Halloween nails are meant to be fun and creative!
These simple Halloween Nail Ideas are perfect for anyone who wants festive nails without spending hours at a salon. You can mix and match designs, try new colours, and have fun experimenting this Halloween.
Quick Halloween Nail Designs for Beginners
Even if you’re new to nail art, you can still create eye-catching designs:
- Polka Dot Pumpkins: Orange base with black dots to look like mini pumpkins.
- Candy Corn Nails: Yellow, orange, and white stripes for a sweet look.
- Mini Skulls: White base and simple black dots and lines for skull faces.
- Bat Silhouettes: Black bats on purple or white nails.
These designs require minimal effort but make your nails stand out.
Advanced Yet Easy Designs for Halloween Fans
If you want slightly more detailed nails but still easy to do, try these:
- Glow-in-the-Dark Nails: Use glow nail polish for spooky nails that shine at night.
- Ombre Halloween Nails: Blend two colours like orange and black for a gradient effect.
- Haunted House Accent Nail: Paint a small haunted house on one nail and keep the others simple.
Even with advanced designs, you don’t need a professional. With patience, anyone can try these.
Using Nail Accessories for Faster Halloween Nail Ideas
Accessories can make your nails look professional without much effort:
- Stickers and Decals: Choose Halloween-themed stickers like pumpkins, ghosts, or witches.
- Rhinestones and Gems: Add sparkles to highlight a nail.
- Nail Tapes and Strips: Perfect for creating clean lines and patterns.
Using these tools saves time and ensures your Halloween nails look polished.
Step-by-Step Guide for a Quick Halloween Nail Look
- Prepare Your Nails: Trim, file, and buff your nails.
- Apply Base Coat: Protects nails from staining.
- Choose a Base Colour: Black, orange, or purple works great.
- Draw Simple Designs: Use dotting tools, brushes, or stickers.
- Add Top Coat: Seal your design and increase longevity.
Following these steps can give you beautiful Halloween Nail Ideas in under 30 minutes.
Table: Quick Halloween Nail Designs and Time Required
| Design | Tools Needed | Time Required | Difficulty Level |
|---|---|---|---|
| Pumpkin Nails | Orange polish, black pen | 10-15 min | Easy |
| Ghost Nails | White polish, dotting tool | 10 min | Easy |
| Spider Web Nails | Black polish, thin brush | 15 min | Medium |
| Blood Drip Nails | Red polish, brush or toothpick | 10 min | Easy |
| Candy Corn Nails | Yellow, orange, white polish | 10 min | Easy |
| Glow-in-the-Dark Nails | Glow polish | 15 min | Medium |
Tips to Make Your Halloween Nails Last Longer
- Always apply a base coat to protect nails.
- Use thin layers of polish to prevent chipping.
- Let each layer dry completely before adding the next.
- Apply a top coat to seal your design.
- Avoid activities that can scratch your nails immediately after painting.
Following these tips keeps your Halloween nails looking fresh for days.
Halloween Nail Colour Combinations to Try
Choosing the right colour combination is key to stylish Halloween nails. Here are some Halloween Nail Ideas:
- Classic: Orange and black
- Spooky: Black and purple
- Sweet Halloween: Yellow, white, and orange (candy corn inspired)
- Gothic Glow: Black with glow-in-the-dark details
- Mystery Night: Dark green and black
Experimenting with colours allows you to create unique looks that match your costume.
Common Mistakes to Avoid in DIY Halloween Nails
Even easy designs can go wrong if you’re not careful. Avoid these mistakes:
- Skipping the Base Coat: Nails can get stained.
- Thick Layers of Polish: Causes smudges and longer drying times.
- Rushing the Design: Wait for polish to dry before adding details.
- Forgetting the Top Coat: Designs chip easily without it.
- Overcomplicating the Design: Sometimes simple designs are better.
Being mindful of these mistakes makes your DIY nails look professional.
FAQs About Halloween Nail Ideas
Q1: How long does it take to do Halloween nails at home?
A1: Most simple designs take 10–20 minutes. More detailed designs may take 30–40 minutes.
Q2: Can I use regular nail polish for Halloween designs?
A2: Yes, regular nail polish works fine, but gel polish lasts longer.
Q3: Do I need special tools for Halloween nail art?
A3: No, simple tools like dotting tools, brushes, or even toothpicks can work.
Q4: How can I make my Halloween nails last longer?
A4: Apply a base coat, let layers dry fully, and seal with a top coat.
Q5: Can kids do Halloween nails at home?
A5: Yes, simple designs like pumpkins, ghosts, and candy corn are safe and easy for kids.
Conclusion: Have Fun With Your Halloween Nails
Creating Halloween Nail Ideas at home doesn’t have to be complicated. With simple tools, a few colours, and a little creativity, you can have festive nails in no time. From cute pumpkins to spooky ghosts and glittery designs, these easy Halloween Nail Ideas are perfect for everyone. Try these designs, mix colors, and have fun showing off your nails this Halloween. Remember, the goal is to enjoy the process and let your creativity shine!
Call to Action
Don’t wait! Grab your favourite nail polishes and start creating your spooky, cute, or glittery Halloween nails today. Share your designs with friends, or tag us on social media to show off your creativity. Whether you’re a beginner or a nail pro, these easy DIY designs will make your Halloween look extra fun. Get started now and make your nails the star of your Halloween look!
